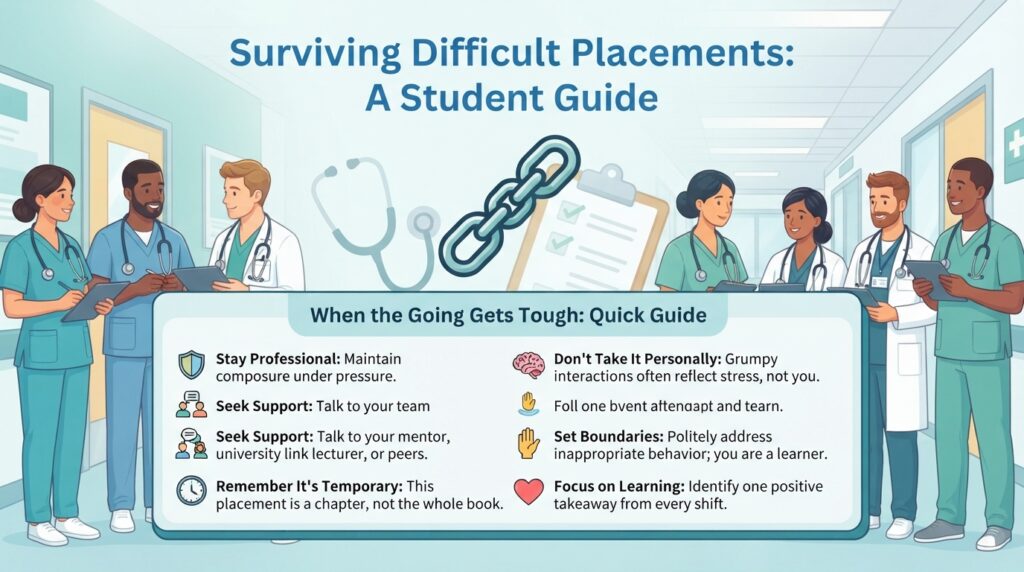
The Ultimate Ward Placement Survival Guide:
Stepping onto a hospital ward or community placement as a student nurse is one of the most thrilling—and terrifying—experiences of your professional training. Whether you are a first-year student wearing your uniform for the first time or a third-year student stepping up to manage a bay of acute patients, clinical placements make up 50% of your nursing degree.
University lectures provide you with theoretical knowledge, but real-world NHS wards are fast-paced, unpredictable environments. You are expected to balance complex clinical tasks, learn new documentation systems, adapt to different multidisciplinary teams (MDTs), and maintain high standards of patient care—all while managing your own stress and exhaustion.
This comprehensive, step-by-step guide is designed to help you navigate every aspect of your placement journey. From pre-placement preparation and mastering the A–E assessment to overcoming “imposter syndrome” and mastering clinical handovers, here is everything you need to know to excel in your practice learning.
Section 1: Pre-Placement Preparation (The First 72 Hours)
Success on placement begins days before you actually set foot on the ward. Arriving unprepared increases your initial anxiety and wastes valuable learning time. Taking a structured approach before Day One sets a professional tone with your Practice Supervisor and Practice Assessor.
1. Contact Your Placement Area Early
Reach out to your placement area via phone or email at least two to three weeks before your start date.
- Who to ask for: The Placement Educator, Ward Sister, or Charge Nurse.
- Key information to gather:
- Shift patterns (e.g., long days vs. short shifts, night shift expectations).
- Uniform policies (e.g., shoe requirements, hair, bare-below-the-elbows rules).
- Common conditions, procedures, and medications seen in that specific setting.
- Parking arrangements, public transport options, or breakroom facilities.
2. Tailor Your Revision to the Specialty
Every clinical area has its own “bread and butter” pathology and pharmacology. Align your pre-reading to the environment:
- Respiratory Ward: Revise COPD, pneumonia, arterial blood gas (ABG) interpretation, and oxygen delivery devices (e.g., Venturi masks, non-rebreather masks).
- Surgical Ward: Review post-operative complications, wound care (primary vs. secondary intention), fluid balance monitoring, and PCA (Patient-Controlled Analgesia) pumps.
- Community / District Nursing: Focus on leg ulcer classification, wound dressing selection, insulin administration, and safeguarding frameworks.
3. Prepare Your Placement Bag
Keep a dedicated “placement survival kit” packed and ready to go:
- 2–3 black pens and a permanent marker (markers are invaluable for dating dressings and IV bags).
- A small, blank pocket notebook for writing down unfamiliar drug names, medical acronyms, or task lists.
- A fob watch (do not rely on smartwatches, as many NHS trusts have strict bare-below-the-elbow policies).
- High-protein snacks, a refillable water bottle, and small change for vending machines.
- Your university badge and Practice Assessment Document (PAD / MyEAD).
Section 2: Clinical Practice Frameworks (A–E Assessment & NEWS2)
When a patient’s condition deteriorates, or when you are conducting your initial morning assessment, having a systematic, structured routine prevents crucial signs from being missed. The ABCDE (Airway, Breathing, Circulation, Disability, Exposure) framework is the universal standard across UK healthcare.
                  ┌─────────────────────────────────────────┐
                  │   ABCDE CLINICAL ASSESSMENT FRAMEWORK   │
                  └────────────────────┬────────────────────┘
                                       │
         ┌───────────────────┬─────────┴─────────┬───────────────────┐
         ▼                   ▼                   ▼                   ▼
  ┌──────────────┐    ┌──────────────┐    ┌──────────────┐    ┌──────────────┐
  │  A - AIRWAY  │    │B - BREATHING │    │C-CIRCULATION │    │D-DISABILITY  │
  ├──────────────┤    ├──────────────┤    ├──────────────┤    ├──────────────┤
  │ Patency Check│    │ Resp Rate    │    │ Pulse & BP   │    │ ACVPU / GCS  │
  │ Stridor/Gurgle│   │ O2 Saturation│    │ Cap Refill   │    │ Blood Glucose│
  │ Suction/Position  │ Auscultation │    │ Fluid Balance│    │ Pupil Response│
  └──────────────┘    └──────────────┘    └──────────────┘    └──────────────┘
                                       │
                                       ▼
                              ┌──────────────────┐
                              │   E - EXPOSURE   │
                              ├──────────────────┤
                              │ Temperature      │
                              │ Skin/Wounds/Drains│
                              │ Dignity / Warmth │
                              └──────────────────┘
A — Airway
- Is the airway clear and patent? If the patient can speak clearly in full sentences, their airway is patent.
- Signs of obstruction: Gurgling (fluids/vomit), stridor (upper airway narrowing), wheezing, or snoring.
- Immediate interventions: Position the patient upright, apply jaw-thrust or chin-lift if trained, consider oral/nasal suctioning, or call for urgent senior assistance.
B — Breathing
- Respiratory Rate (RR): Count for a full 60 seconds. A changing respiratory rate is often the earliest physiological indicator of acute deterioration.
- Oxygen Saturations (SPO2): Check baseline requirements. Are they on target (e.g., 94–98% for standard patients, or 88–92% for patients at risk of hypercapnic respiratory failure)?
- Work of Breathing: Look for intercostal retractions, tracheal tug, nasal flaring, or use of accessory muscles.
- Auscultation & Inspection: Observe chest expansion symmetry and listen for breath sounds (crackles, wheezes, absent breath sounds).
C — Circulation
- Pulse & Heart Rate: Assess rate, rhythm (regular or irregular), and strength.
- Blood Pressure: Note systolic and diastolic readings, calculating Mean Arterial Pressure (MAP) if necessary.
- Capillary Refill Time (CRT): Press on the sternum or finger for 5 seconds; normal refill should occur within 2 seconds. Delayed CRT indicates poor peripheral perfusion or shock.
- Fluid Balance & Output: Check urine output ($<0.5\text{ mL/kg/hour}$ indicates acute kidney injury or severe dehydration), inspect IV sites for phlebitis (using the VIP score), and review fluid balance charts.
D — Disability
- Central Nervous System: Assess consciousness using ACVPU (Alert, Confusion, Verbal, Pain, Unresponsive) or the Glasgow Coma Scale (GCS).
- Blood Glucose: Always check blood glucose in any patient with altered mental state, confusion, or a high NEWS2 score. “Never let the sun set on an unknown blood glucose.”
- Pupil Light Response: Check pupil size, equality, and reactivity to light.
E — Exposure
- Body Temperature: Assess for hypothermia or pyrexia.
- Full Body Inspection: Inspect skin integrity, surgical wounds, pressure areas, drains, and rashes while maintaining the patient’s dignity and keeping them warm.
- Review Charts: Cross-examine medical records, drug charts, and recent blood results (e.g., inflammatory markers, electrolytes).
Section 3: High-Yield Clinical Escalation Cheat Sheet
When a patient deteriorates, communicating your concerns quickly and structured to a doctor, advanced nurse practitioner (ANP), or critical care outreach team (CCOT) is essential for patient safety.
Below is an interactive, step-by-step SBAR (Situation, Background, Assessment, Recommendation) escalation guide to keep on your phone or pocket review list.
📋 SBAR CLINICAL ESCALATION CHEAT SHEET
Use this structured framework when escalating deteriorating patients or calling medical teams:
S — SITUATION
Identify yourself, your role, the patient’s location, and the immediate reason for calling.
B — BACKGROUND
Give the clinical context: admission diagnosis, baseline vital signs, and relevant medical history.
A — ASSESSMENT
Report physiological observations, ABCDE findings, and your professional clinical concern.
R — RECOMMENDATION
State what action you need, specify a timeframe, and ask for explicit instructions.
Section 4: Pharmacology & Drug Calculations Made Simple
Drug calculation tests and ward medication administration cause significant anxiety for many student nurses. In the UK, universities enforce high pass thresholds (often requiring 100% on drug calculation exams), while practice assessors closely monitor safe medication management under the NMC Code.
The 6 Rights of Medication Administration
Before preparing or administering any medication alongside your supervisor, systematically check the 6 Rights:
- Right Patient: Verify full name, date of birth, and hospital wristband ID against the prescription chart.
- Right Drug: Double-check the generic name of the drug against the chart and the packaging.
- Right Route: Ensure oral, intravenous, subcutaneous, or intramuscular routes match the prescription.
- Right Dose: Calculate the dose accurately and verify strength/concentration.
- Right Time: Confirm the prescribed frequency and when the last dose was administered.
- Right Documentation: Sign the medication administration record immediately after the patient has taken the medication—never before.
Section 5: Academic Writing & Reflective Practice (Gibbs Reflective Cycle)
Reflective practice is not just an academic requirement for completing your university assignments; it is a core professional requirement mandated by the Nursing and Midwifery Council (NMC) for revalidation. Writing structured reflections helps process challenging shifts, learn from mistakes, and build emotional intelligence.
The Gibbs Reflective Cycle (1988) is the most widely used reflective model in UK nursing education.
                           ┌────────────────────────┐
                           │    1. DESCRIPTION      │
                           │  What happened on shift│
                           └───────────┬────────────┘
                                       │
                                       ▼
                           ┌────────────────────────┐
                           │      2. FEELINGS       │
                           │  What were you thinking│
                           └───────────┬────────────┘
                                       │
                                       ▼
                           ┌────────────────────────┐
                           │     3. EVALUATION      │
                           │ What went well / poorly│
                           └───────────┬────────────┘
                                       │
                                       ▼
                           ┌────────────────────────┐
                           │      4. ANALYSIS       │
                           │ What sense can you make│
                           └───────────┬────────────┘
                                       │
                                       ▼
                           ┌────────────────────────┐
                           │     5. CONCLUSION      │
                           │ What else could be done│
                           └───────────┬────────────┘
                                       │
                                       ▼
                           ┌────────────────────────┐
                           │    6. ACTION PLAN      │
                           │ What will you do next  │
                           └────────────────────────┘
Writing a Band-1 (High-Grade) Nursing Reflection: Step-by-Step
1. Description
Keep this section brief, objective, and strictly anonymised to comply with GDPR and NMC standards (e.g., use “Patient X” or “Mr. A”). State where you were, who was involved, and the event’s sequence.
2. Feelings
Be authentic about your emotional state. Were you anxious when performing your first catheterisation? Did you feel overwhelmed during a cardiac arrest call? Acknowledging raw emotions demonstrates self-awareness and emotional intelligence.
3. Evaluation
Critically evaluate what aspect of the situation went smoothly and what felt challenging. Did team communication work well? Was there a delay in retrieving equipment?
4. Analysis (The Most Important Section for High Marks)
Connect your real-world experience to academic literature, clinical guidelines, and legal frameworks.
- Example: “During the escalation of Patient X, I utilized the SBAR framework. Literature by Smith et al. (2023) demonstrates that structured handover tools reduce clinical error rates by 35% during acute deterioration. Furthermore, applying Section 1 of the Mental Capacity Act (2005) ensured patient autonomy was preserved during consent…”
5. Conclusion
Summarise what you learned from the experience. What skills or theoretical knowledge do you still need to develop?
6. Action Plan
Outline concrete, practical steps for your next shift. For example: “Before my next placement shift, I will re-read the Trust policy on syringe drivers and practice verbalizing SBAR handovers with my Practice Supervisor.”
Section 6: Navigating Placement Relationships & Professional Standards
The quality of your learning experience depends heavily on how effectively you collaborate with your Practice Supervisor (PS) and Practice Assessor (PA). Under the NMC Standards for Student Supervision and Assessment (SSSA), clear communication and proactive engagement are key.
                 ┌──────────────────────────────────────────┐
                 │       NMC SSSA ROLES DEMYSTIFIED         │
                 └────────────────────┬─────────────────────┘
                                      │
         ┌────────────────────────────┴────────────────────────────┐
         ▼                                                         ▼
  ┌─────────────────────────────┐           ┌─────────────────────────────┐
  │     PRACTICE SUPERVISOR     │           │      PRACTICE ASSESSOR      │
  ├─────────────────────────────┤           ├─────────────────────────────┤
  │ • Supervises daily practice │           │ • Conducts formal assessments│
  │ • Serves as a role model    │           │ • Reviews evidence in PAD   │
  │ • Provides ongoing feedback │           │ • Makes progression decisions│
  │ • Writes observational notes│           │ • Confirms competency milestones│
  └─────────────────────────────┘           └─────────────────────────────┘
How to Build a Strong Working Relationship
- Share Your Learning Outcomes Early: On your first day, show your supervisor your specific university learning objectives and target competencies for the placement.
- Be Proactive, Not Passive: Don’t sit in the office waiting to be assigned tasks. Offer to assist with observations, personal care, dressing changes, or drug rounds.
- Welcome Constructive Feedback: Ask at the end of every shift: “What is one thing I did well today, and what is one area I can improve on tomorrow?”
- Keep Your Documentation Up to Date: Complete your initial, midpoint, and final placement interviews well ahead of deadlines. Do not leave your PAD documentation until the final day of placement.
Section 7: Mental Health, Resilience, and Overcoming Burnout
Nursing placements are physically demanding and emotionally intense. Shift work, witnessing human suffering, managing heavy workloads, and academic deadlines can lead to burnout if you do not actively practice self-care.
It is ok to not be ok
Practical Strategies to Prevent Burnout
- Establish a Post-Shift Transition Routine: Develop a physical ritual to signal the end of your shift. Changing out of your uniform, showering immediately upon returning home, or listening to a favorite podcast on your commute helps separate work from your personal life.
- Process Emotional Distresses: Experiencing patient death, complex resuscitation, or medical emergencies can leave emotional scars. Never carry traumatic events alone. Request an immediate debrief with your mentor, speak to your Academic Assessor, or access your university’s confidential counseling services.
- Protect Your Days Off: Avoid doing assignment writing or studying on every single day off. Schedule at least one completely work-free day every week to rest, socialise, and recharge.
- Prioritise Sleep Hygiene: Night shifts require careful preparation. Invest in blackout blinds, earplugs, and maintain a consistent sleep schedule between consecutive night shifts.
Final Thoughts: You Belong in This Profession
There will be shifts where you feel confident, capable, and proud of the care you delivered. There will also be shifts where you feel overwhelmed, exhausted, or question whether you are cut out to be a nurse.
Remember that every expert nurse, Sister, and Consultant Practitioner was once a nervous student nurse standing outside the ward doors on their very first day. Competence and confidence take time to build.
Stay curious, advocate fiercely for your patients, support your fellow students, and celebrate every small clinical victory along the way. You are building a skill set that changes lives every single day.